Ever since Hyperion Application Link (HAL) died, people have looked for ways to help them load data and metadata into their Oracle EPM applications. ODI became a favorite tool of several developers due to its flexibility and ability to load to Essbase, Planning, and HFM. However, a complicated and in some cases very expensive licensing structure makes ODI less appealing today as it has been in the past for EPM practitioners.
You may be thinking, “But I get to use ODI for free with my Planning Plus/Financial Management Plus licenses.” That is true; however, according to the EPM Licensing Guide, the Restricted Use License for ODI only allows the use of the embedded agent within the ODI Studio. It does not allow for the use of standalone agents. Standalone agents are the key to running the ODI scheduler, so you are effectively limited to running your ODI scenarios manually from ODI Studio.
As you may know, FDMEE was released in the 11.1.2.3 version and has really blossomed in the 11.1.2.4 release. As Oracle has stated on their road map, FDMEE will become the favored solution for loading data into and synchronizing data between EPM applications. That transition is well on its way.
So, let’s pretend that you are a customer who has “seen the light” and purchased FDMEE licenses (and at least one adapter license) and are now ready to implement. Where do you begin after installation?
Generating the System Folders
Setting up the FDMEE file structure should be one of the first things that you do in a new implementation of FDMEE. This allows the importing of files into FDMEE and sets up all of the folders needed for FDMEE to work properly.
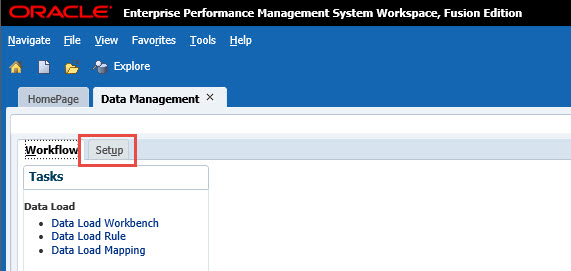
From inside FDMEE, click the Setup tab.
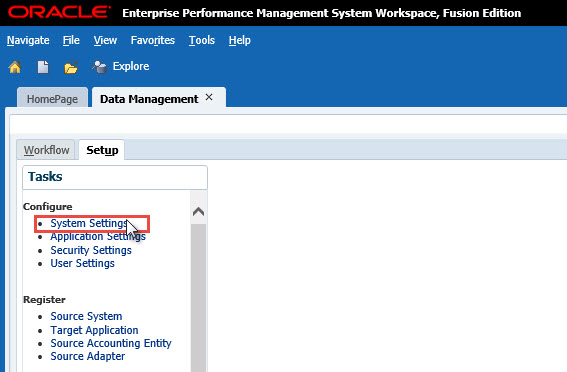
Next, click the System Settings link on the left side.
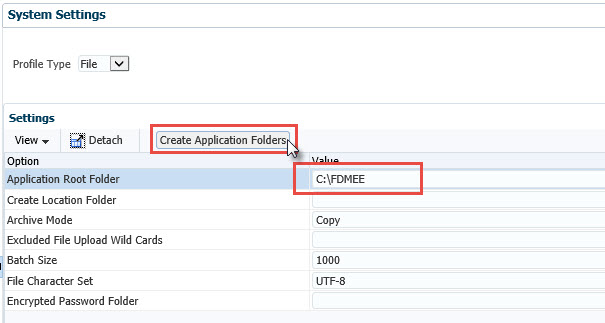
Enter your application root folder directory. C:\FDMEE is my directory on this sandbox VM as all of my products are deployed to one server. You may use a UNC path for the application root folder instead of an absolute path. Click on Create Application Folders.
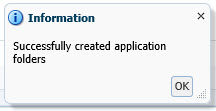
A confirmation message is displayed:
Period Mapping
Before we get too excited about setting up source systems and target applications, I like to make sure that my POV has all of the required elements first. It’s pretty easy to forget the period or category mapping when we are first setting up FDMEE and then we’ll get all sorts of strange messages when trying to run our first integration.
Before setting up your period mapping, we need to take a look at the applications that we are going to be integrating with. What is the most granular period of time for all of your applications? Is it Monthly, Weekly, Daily, or something else entirely? The most granular period level determines how your Global Period Map is set up.
At a client of mine, they have one daily application, several monthly applications, and one yearly application. That forces us to create a period mapping for every day in the Global Period Map. We then use an application mapping to choose the first of each month as a valid period for our monthly applications. The yearly application similarly has the first day in their fiscal calendar for each year in the application map.
In FDMEE 11.1.2.4, Oracle added the Excel Interface which allows us to download data from the FDMEE tables into Excel. This is a great way to fill out your Period Mapping data without painfully entering each day into the FDMEE interface. I will typically start by adding a couple of periods into the Period Map manually to seed it with some data before exporting it to Excel.
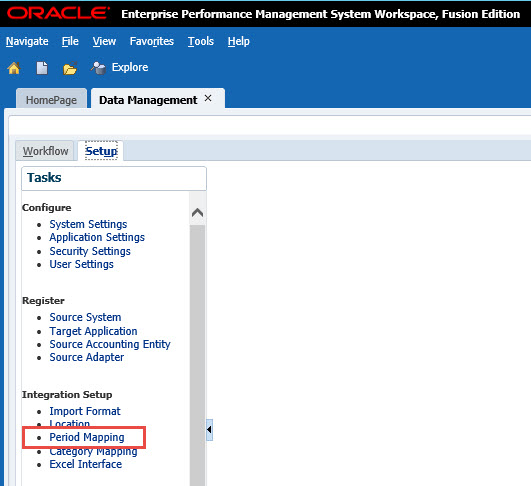
To seed the Period Map, select the Period Mapping link on the Setup tab in FDMEE.
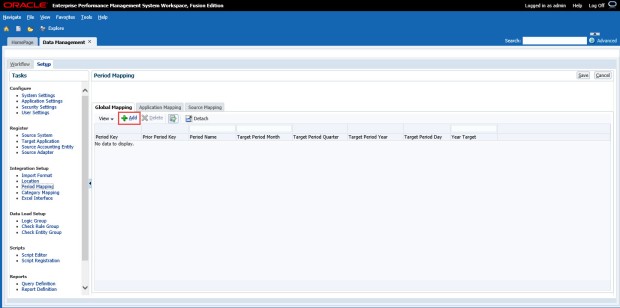
Click the Add button to add the period maps.
Enter the appropriate data for the Target Period and Year Target columns. Click Save once complete.
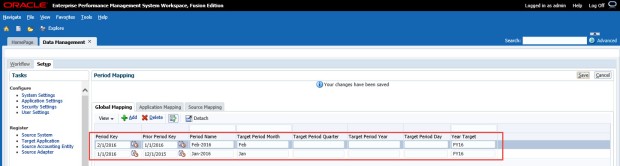
Notice the Period Name field is Month-Year. This is due to a not very well documented “feature” that requires Period Names to not include spaces if we are going to use the FDMEE batch script utilities to kick off data load rules.
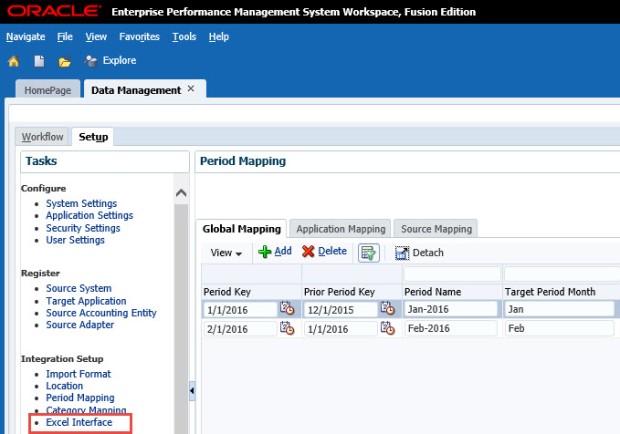
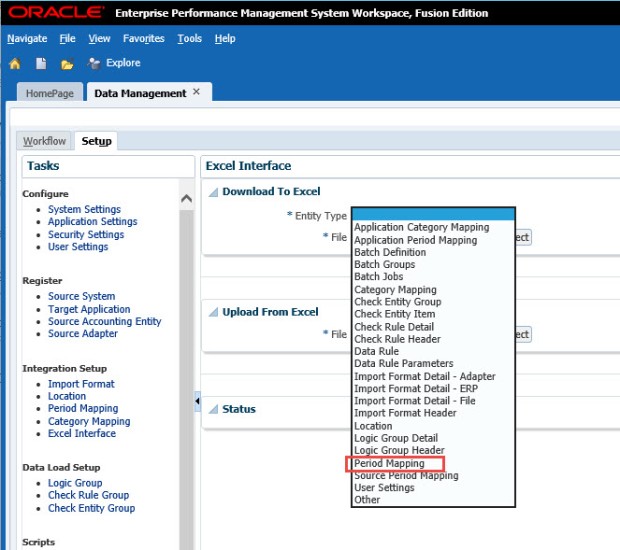
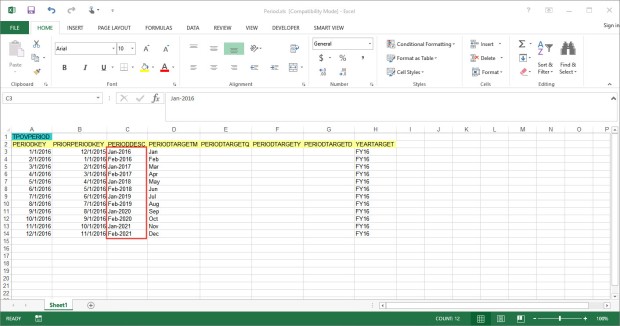
To fill out the rest of FY16, let’s use the Excel Interface. Click on the Excel Interface link on the Setup tab of FDMEE.
Open the Entity Type drop-down box and select Period Mapping.
Enter a file name and click the Download button. FDMEE will append the .xls extension for you.
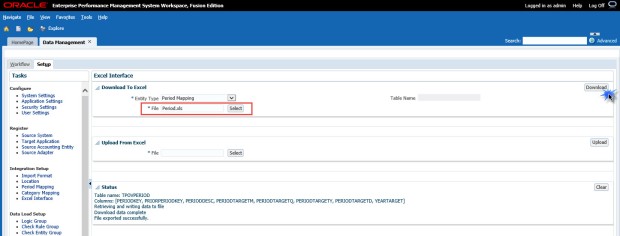
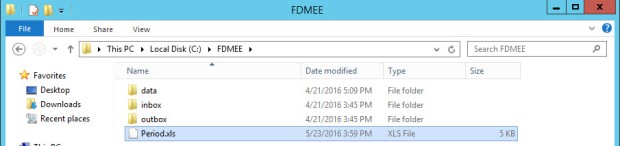
The file will be saved in your FDMEE application folder location.
Next, I will open the Period.xls file that I saved and drag the PERIODKEY column down to auto-fill the rest of FY16.
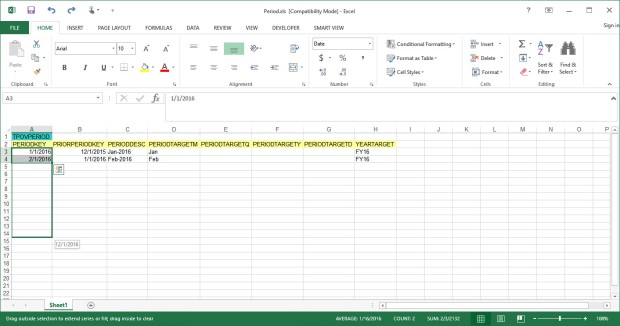
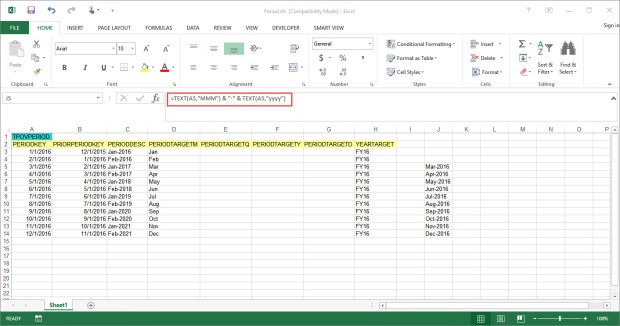
I do the same for the other columns with data, but we ran into a problem with the text field PERIODDESC.
To fix that, I write a quick formula using the TEXT() function to build the correct PERIODDESC based on the PERIODKEY field. These functions come in very handy if you are working with a daily Period Mapping table.
Next, copy the formulas and paste the values over the incorrect PERIODDESC entries.
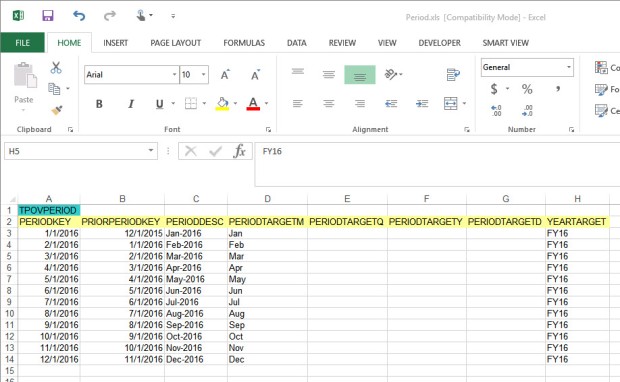
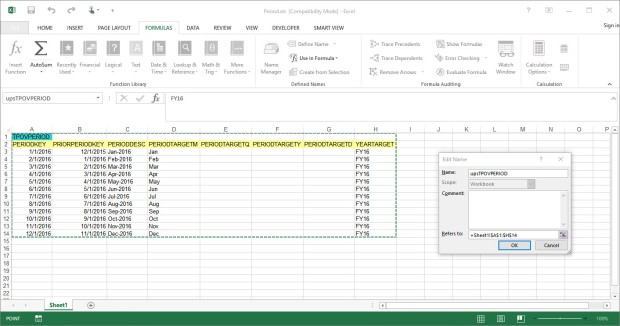
The Excel Interface files have a named range in them that corresponds to the FDMEE repository table name. Any time that I have inserted records into a table like this, the range always seems to be thrown off. The last step is to fix the named range and make sure that it includes your newly added records.
In Excel, click on the FORMULAS ribbon and click the Name Manager button to edit the named range.
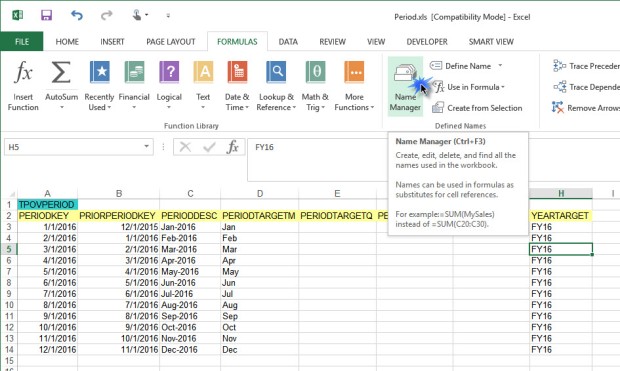
Edit the range to include all of the data cells and the header records.
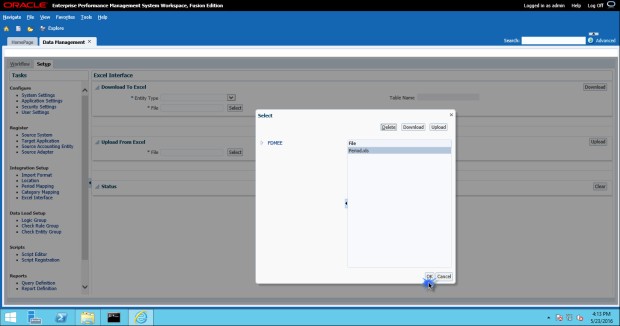
Save your file back to the FDMEE application folder location. Now, we need to upload the file to FDMEE to insert our Period Mapping records.
On the Excel Interface page, under the “Upload From Excel” box, click the Select button to browse to our Period.xls file and click OK.
Click the Upload button to upload the file. There is a log displayed on the Excel Interface screen that shows the status of your actions.
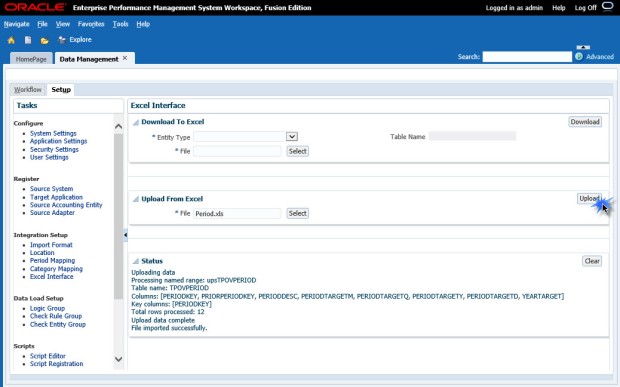
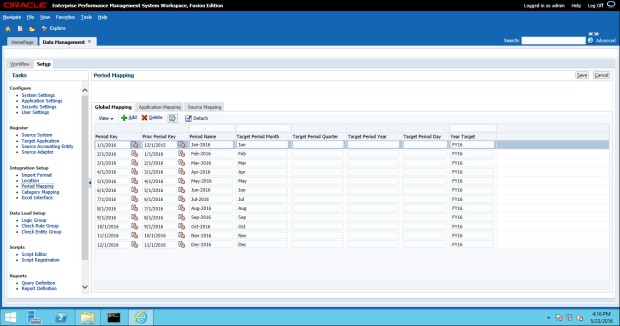
Now, browsing back to the Period Mapping task, we can see that our periods were imported properly.
Adding additional periods is an ongoing maintenance item that an FDMEE administrator will need to do periodically. The Excel interface only allows adding new data to the TPOVPERIOD table, it does not allow you to update existing data unfortunately.
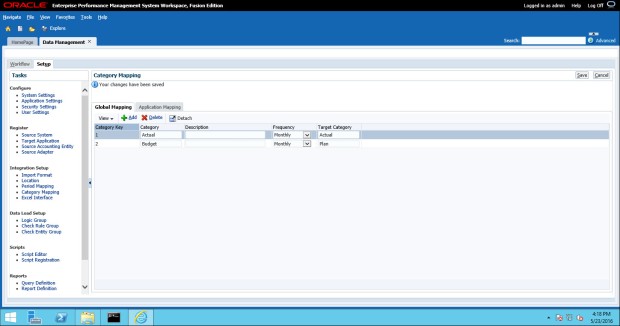
Category Mapping
The final bit of setup for this post is the Category Mapping. The category maps are much less dynamic than the Period Mapping and usually will not require as much maintenance.
For the categories (or scenarios), I typically add them manually through the FDMEE user interface. Simply click on the Category Mapping task in the FDMEE Setup tab and add the categories (or scenarios) as needed. Here I created a Budget category that will map to the “Plan” dimension in my application.
These are some of the first steps that I would typically take when getting started in FDMEE. For now, this is where I will leave you. There are many more things to do such as set up your source and target applications and create import formats, locations, data load rules, and data maps. The FDMEE administration guide is an excellent resource for the other tasks as well as scripting in Jython. I recommend bookmarking the EPM Documentation site it as you will use it often.

One comment